How it works
The workflow is designed to move the patient from visit capture to post-visit action with as little ambiguity as possible.
MyHealthVaultAI is not only a summary generator. It is a structured sequence: consent, encounter capture, summary production, medication review, patient confirmation, and ongoing portal access. The goal is to make important instructions easier to retain, review, and act on after the appointment ends.
Patient sequence
Product preview
A quick visual view of the patient workflow
These screens help connect the patient instructions to the actual interface experience: encounter capture, summary generation, and medication review.
Patient instructions
What the patient should do during and after the visit
These steps are designed to make the workflow clearer for everyday use while preserving the logic of the larger clinical intelligence system behind the product.
Obtain provider permission before recording
Before the visit begins, ask your provider for permission to record the session. MyHealthVaultAI is designed to support recall and follow-through, and the encounter should only be captured with appropriate consent.
State the provider name clearly at the beginning
Say the doctor’s name clearly near the start of the visit. This improves how the visit is labeled and organized inside the summary list, timeline, and future portal review.
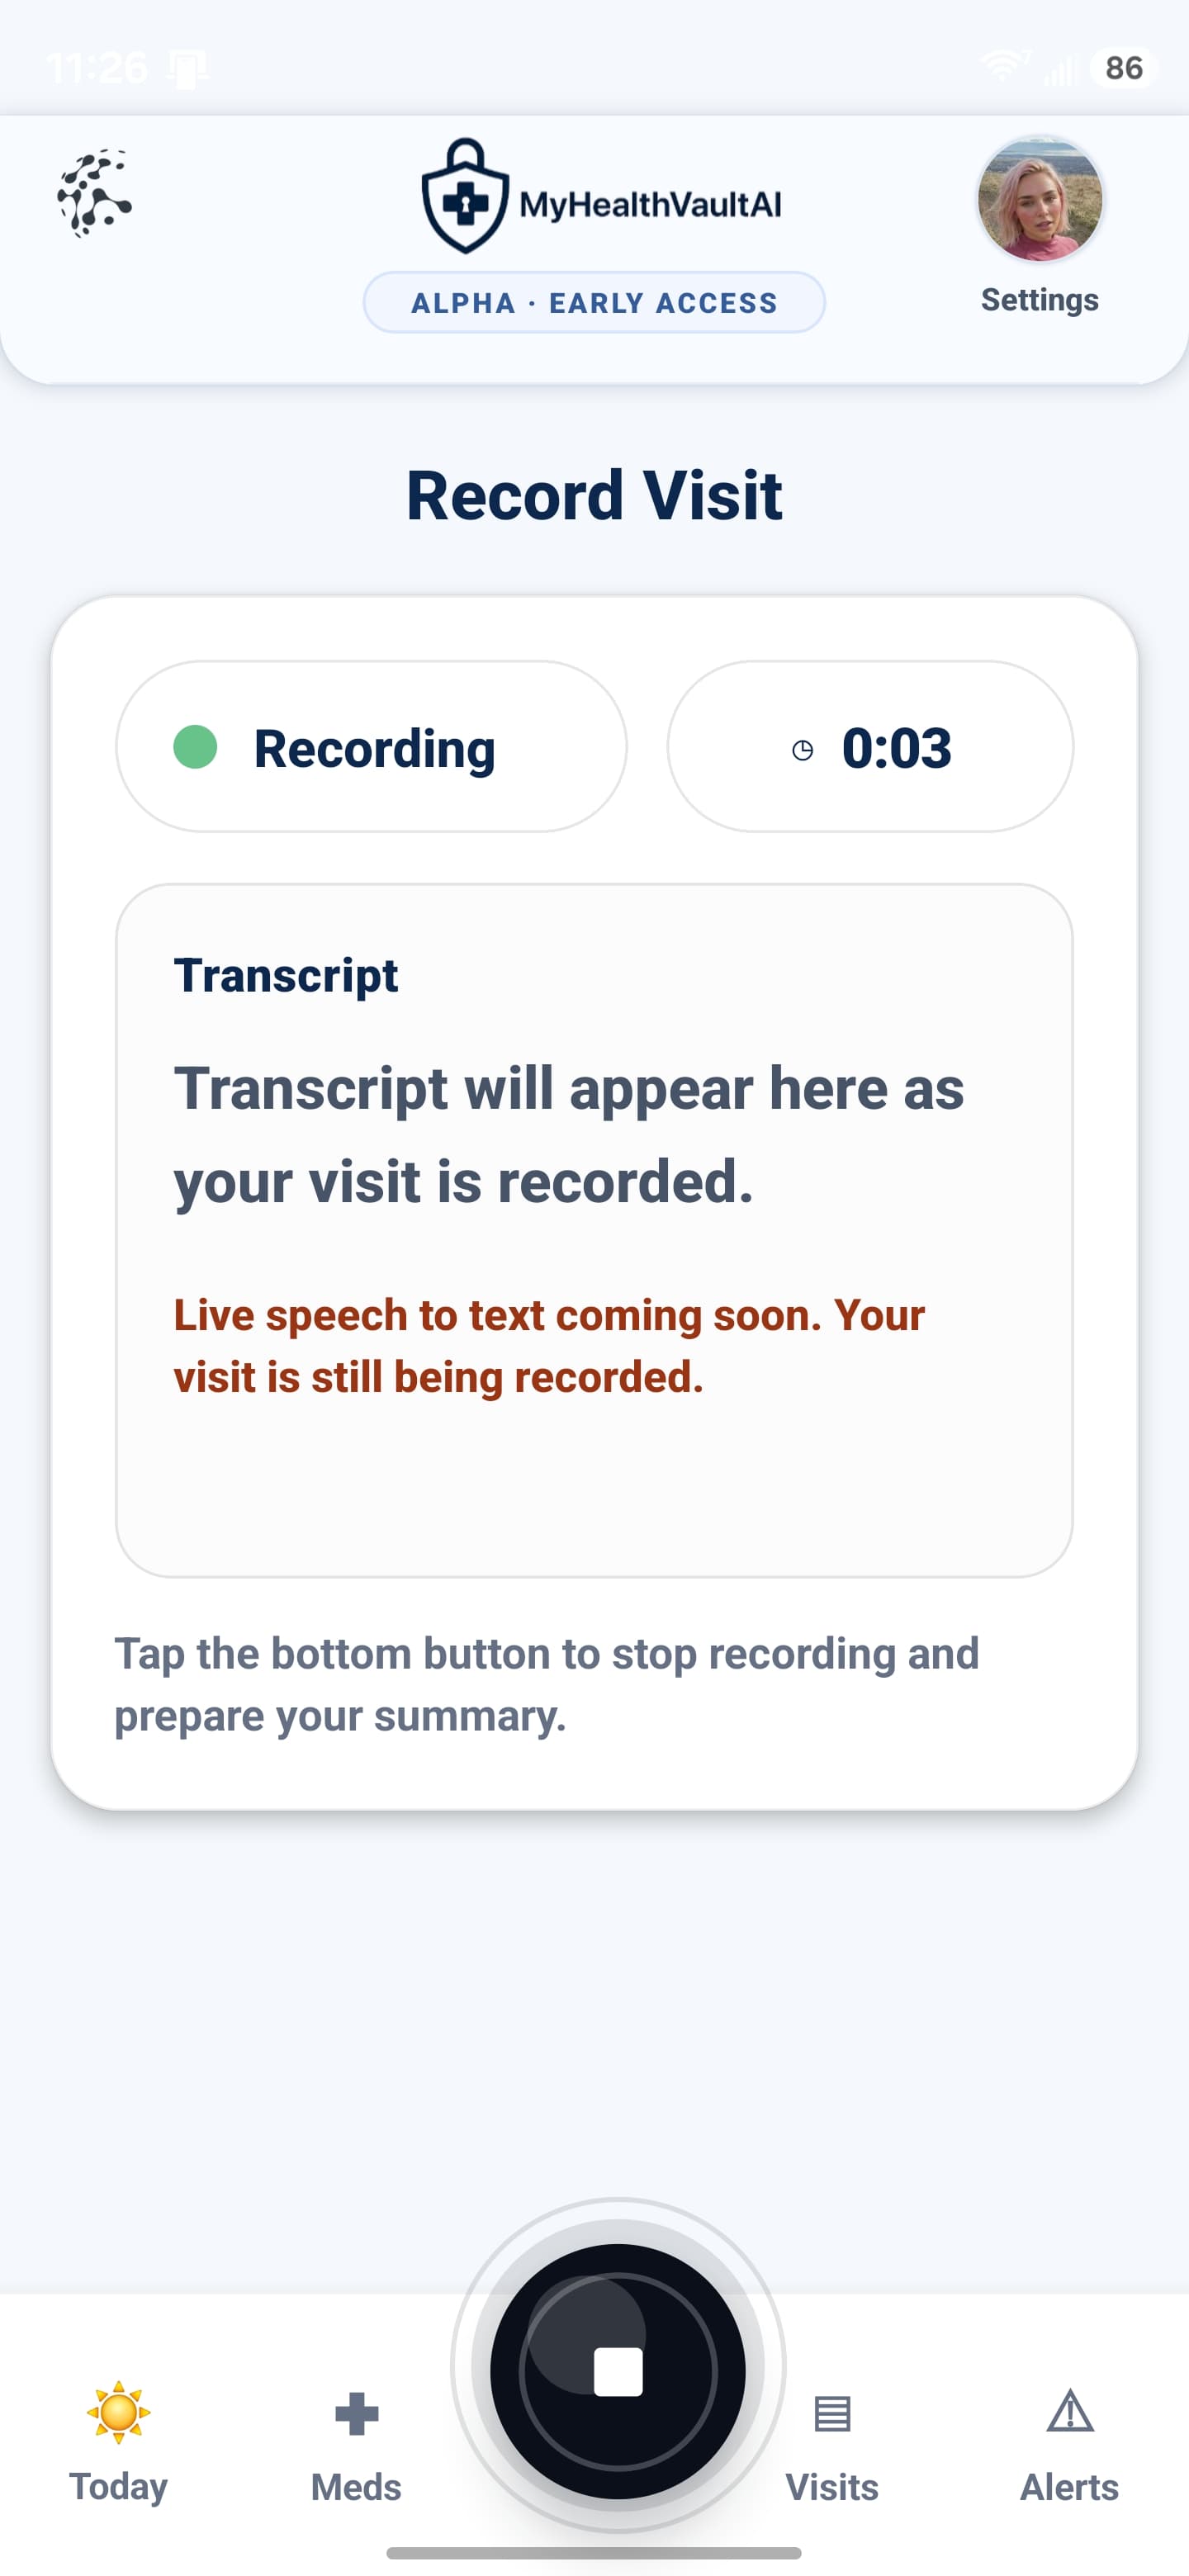
Press the red button to begin encounter capture
Once permission is granted, press the red record button to begin capturing the visit. This starts the upstream input used for summary generation, medication extraction, and post-visit review.
End the recording when the visit is complete
When the appointment is finished, press the black stop button and allow the system time to process the encounter. The recording is then used to generate the structured visit summary and downstream review workflow.
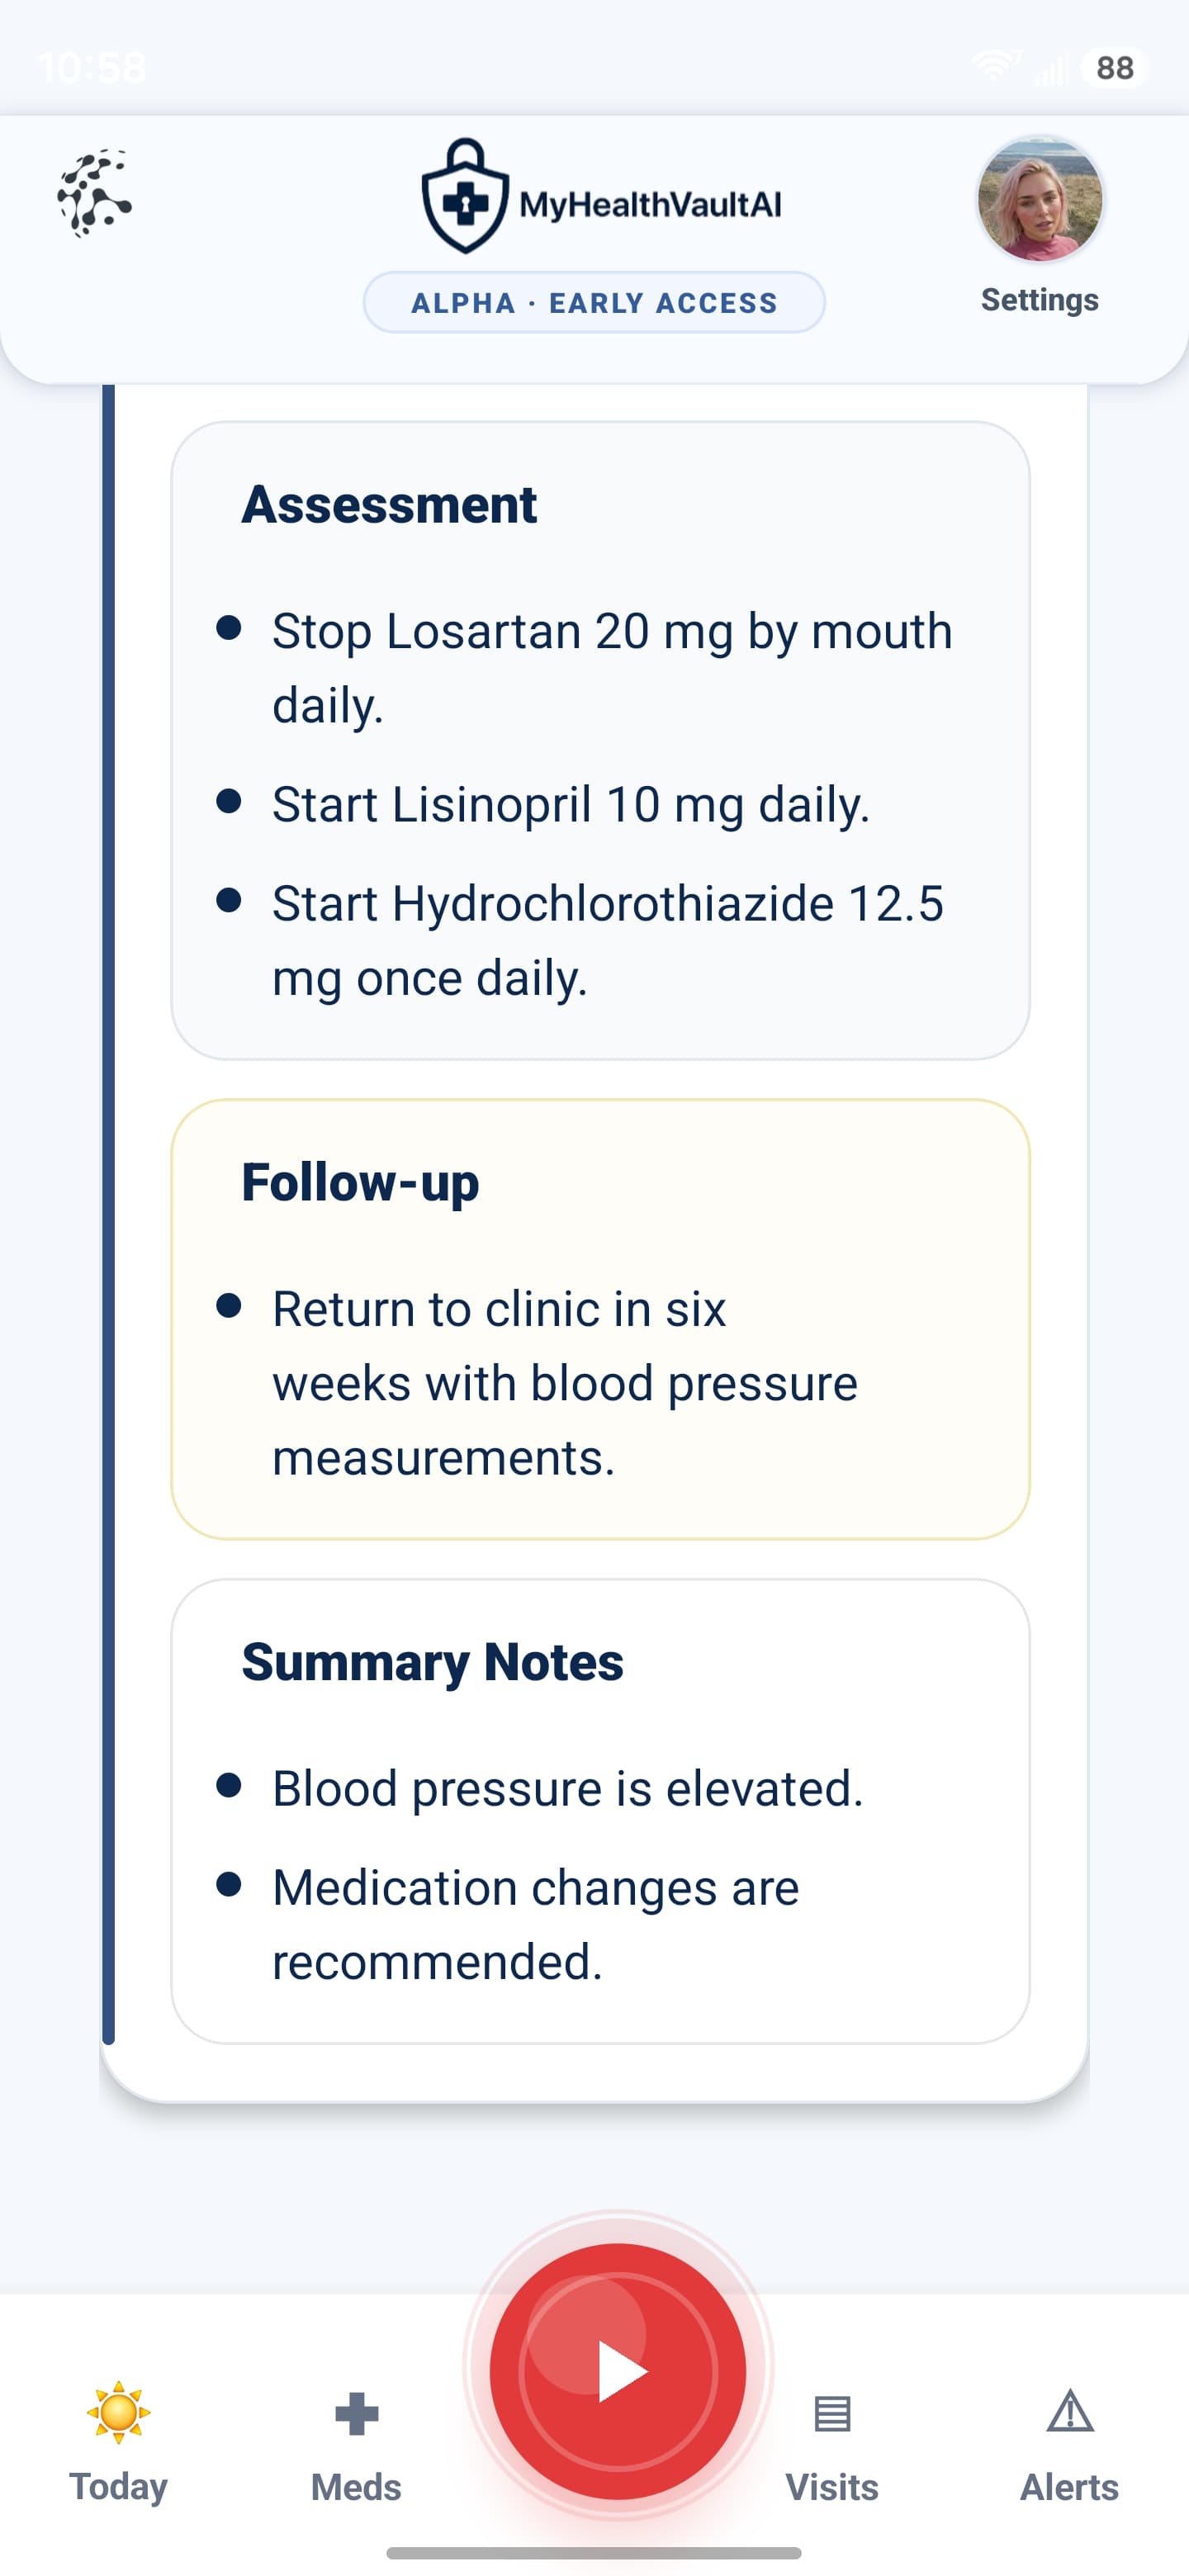
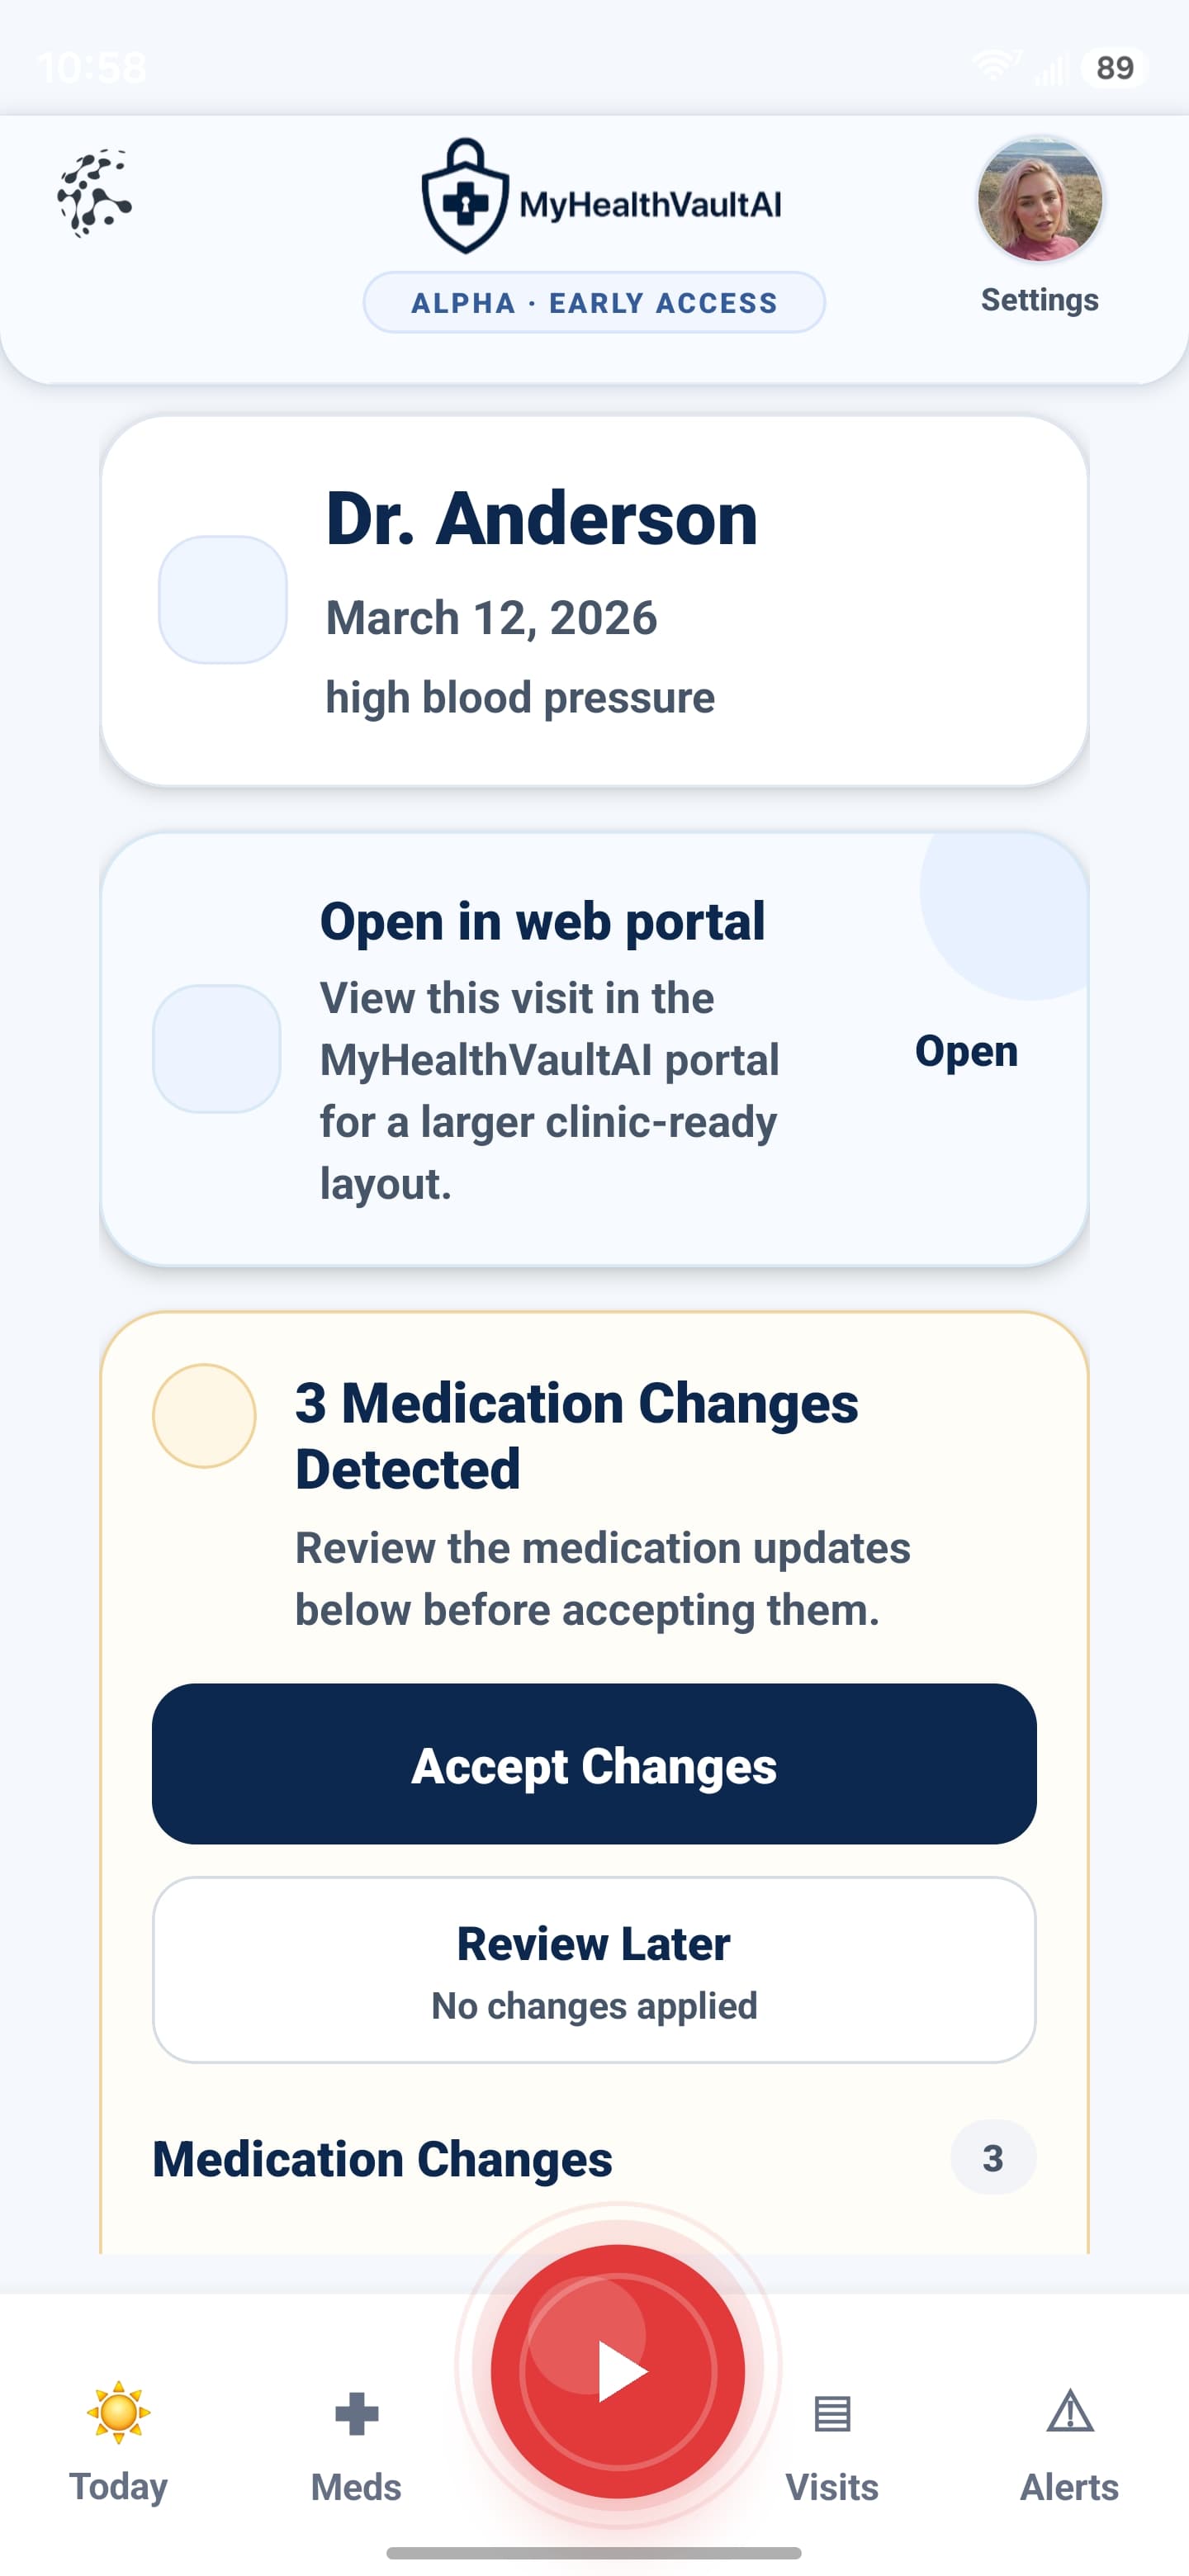
Review medication changes and confirm what is correct
If the system detects medication additions, removals, or dose changes, review them carefully. The goal is to make medication changes visible so they can be confirmed before becoming part of the ongoing record.
Use settings to complete the patient profile
Inside the avatar and settings area, you can add demographics, insurance information, driver’s license details, provider colors, and notification preferences. This helps keep the portal more complete and easier to use over time.
Design logic
Why these steps matter inside the larger workflow
The page works best when it explains not only what the patient does, but why the product is structured this way.
Why the provider name matters
The provider name acts as an anchor for visit organization inside the timeline and summary list. Saying the name clearly improves sorting, longitudinal review, and patient recall when multiple encounters are stored over time.
Why the review step matters
Medication changes should not behave like invisible background updates. The patient review layer makes proposed changes visible so corrections can be made before the record is accepted as current.
Why the portal matters
The portal gives the workflow persistence. Instead of losing instructions after the appointment ends, patients can return to one place to review summaries, medication history, alerts, and structured follow-through information.